Step 4: Deploy Your Code
NB: This page is out of date as of v1.4.0-alpha. It will be updated as soon as possible.
Welcome to Step 4 of the Blawx Beginner's Guide, deploying your code!
In this step, we are going to show you how easy it is to go from a set of rules encoded in Blawx to a sophisticated user-facing application.
The Web API
When you generate a test in Blawx, that also creates a number of web API endpoints that other applications can use to use your encoding and answer the questions defined in your tests. Using the Web API is not "beginner" material, though, so that's not important here. Just remember that anything that we do below in the Scenario Editor can also be done anywhere else, because Scenario Editor is actually just an example of how to use the Blawx Web API.
Scenario Editor
Blawx's "Scenario Editor" is a web-based form that allows you to say what you know (and don't know) about a fact scenario, and get contingent and provable answers to the test question. It is useful for testing your code, and for allowing people who are familiar with the rules you are encoding to test your encoding and seeing if it behaves as expected.
The scenario editor is an application for answering a legal question built almost entirely on the basis of your encoding of the rules. The only thing you need to do to create a web application from a Blawx encoding, is ask a question! That's the minimum, but there is no maximum for how sophisticated a Blawx-empowered application might be.
Create a Web App
To create a web app using Scenario Editor, go into your Project, and create a new test. Remember that test names can't have spaces in them.
Once you have created your test, go into the Test Editor, and encode the question you want your app to answer. In our case, we will have it answer the question "did anyone win any games of rock paper scissors?"
The code for encoding this question we have seen before, and it looks like this:

Don't forget to click "Save" in the button bar when you are done.
You're Done
No, really, that was it! Click on the "Scenario Editor" button in the button bar of the test editor to start your new web app.
Here's what it will look like:
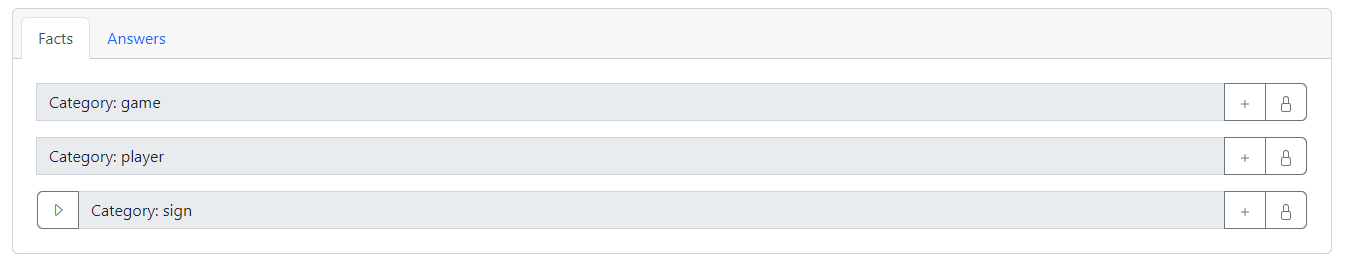
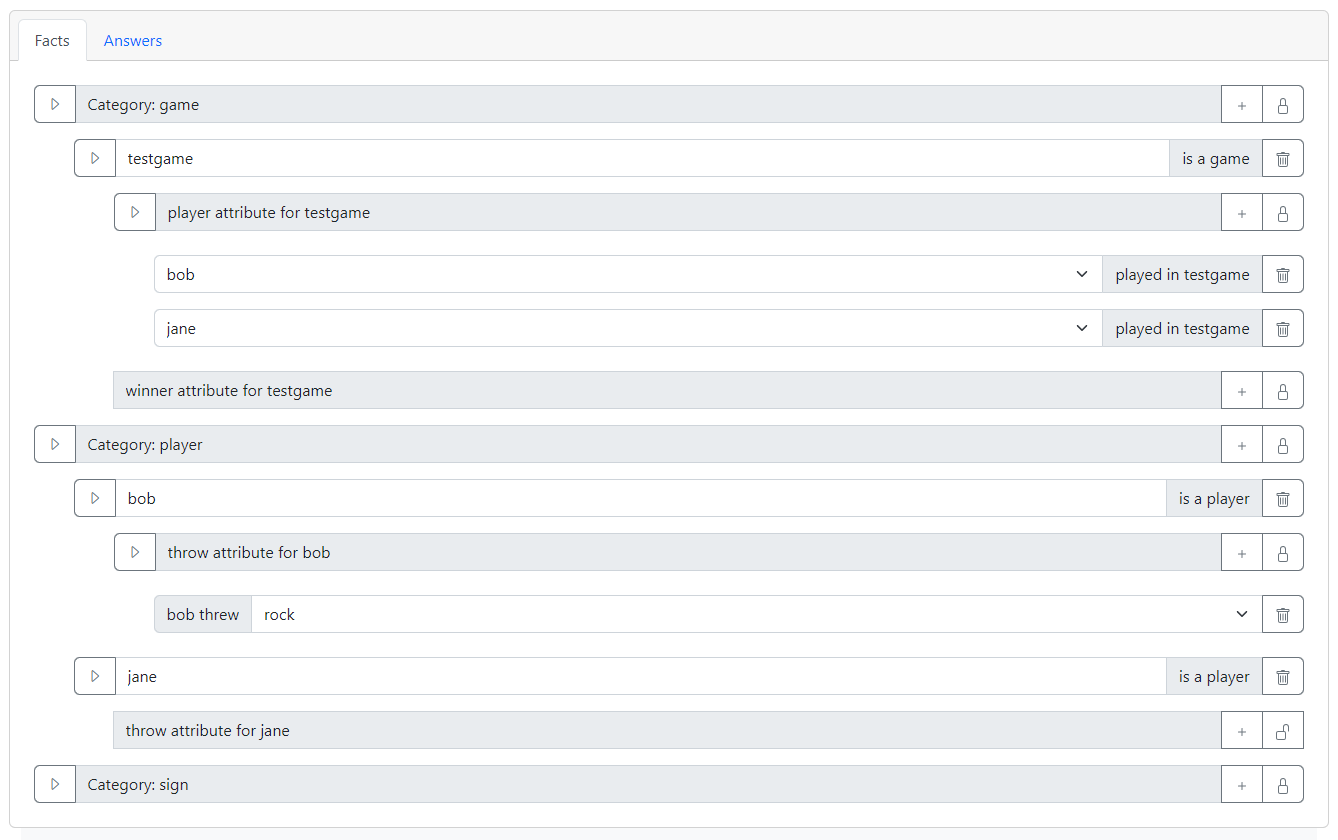
Next to "Category: Player", click the add button, type "bob" (lower case) and hit enter. Do the same thing for "jane". Next to "throw attribute for bob", click the add button and choose "rock" and click the checkmark. Let's pretend we don't know what Jane threw, so click the "unlock" button next to "throw attribute for "jane".
Now click on the "add" button beside "Category: Game". Enter "testgame" as the name of the game and hit enter. Next to "player attribute for testgame", click "add", choose "bob", and click the green arrow. Then do the same to add "jane" to the game.
Here's what your fact scenario should look like:
Click "Run", and after a few moments you will see the following answers:
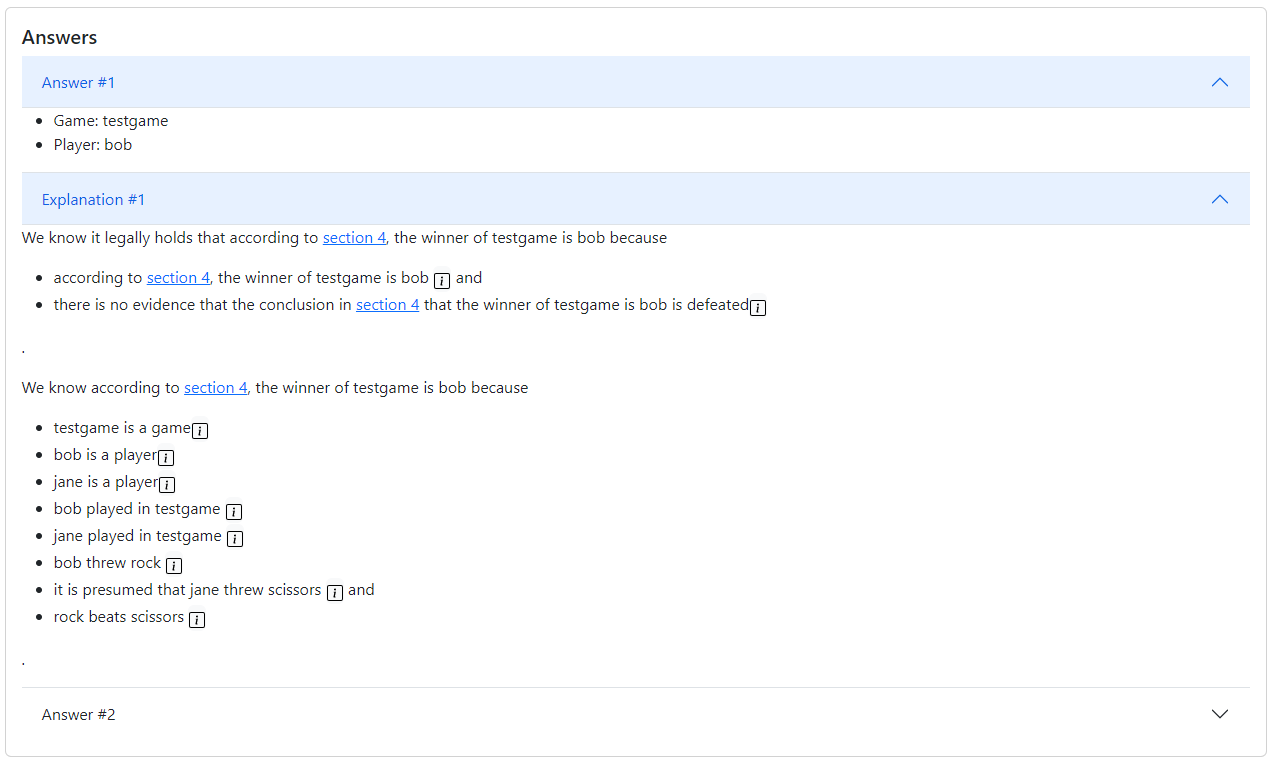
You can see that Blawx has hypothesized that Bob may be the winner of the game, if Jane threw scissors!
If you click on the "Facts" tab at the top of the screen, you will also see that the scenario editor is indicating that Jane's throw is "relevant" to finding un-conditional answers for the question, by highlighting the add button next to "throw attribute for jane" in green.

That's It!
If you want an app, pose a question.
That is the promise of Rules as Code that Blawx is trying to make real.
Check out the Conclusion of the Blawx Beginner's Guide before you go!